Set up your Quote Agent
Guided setup — pick your trade, set your rates, choose the jobs you quote, test a price, set approvals and go live on your website, a quote form and the phone.
Guided setup takes you from nothing to a working Quote Agent in six steps. It saves your price list, creates the agent for you, connects pricing, turns on your website chat and gives you a quote form link — you don't need to build an agent first.
Open your workspace, choose Quote Agent under Engage, and setup starts on its own. To run it again later, click Guided setup at the top of the page.
Prefer to ask? Tell Ikora "set up a quote agent for my auto shop — $140 an hour, 7.5% tax" and it does the same thing after you approve. See Set it up by asking Ikora.
1. Your trade
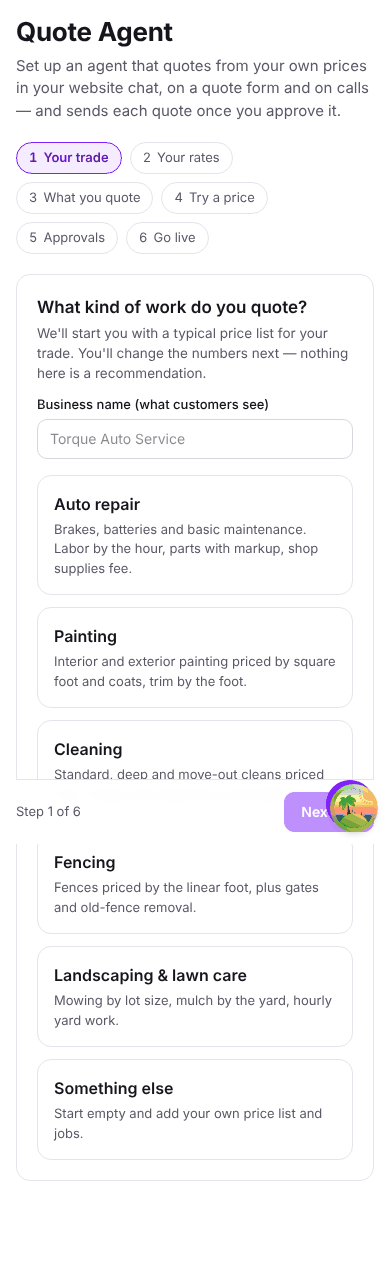
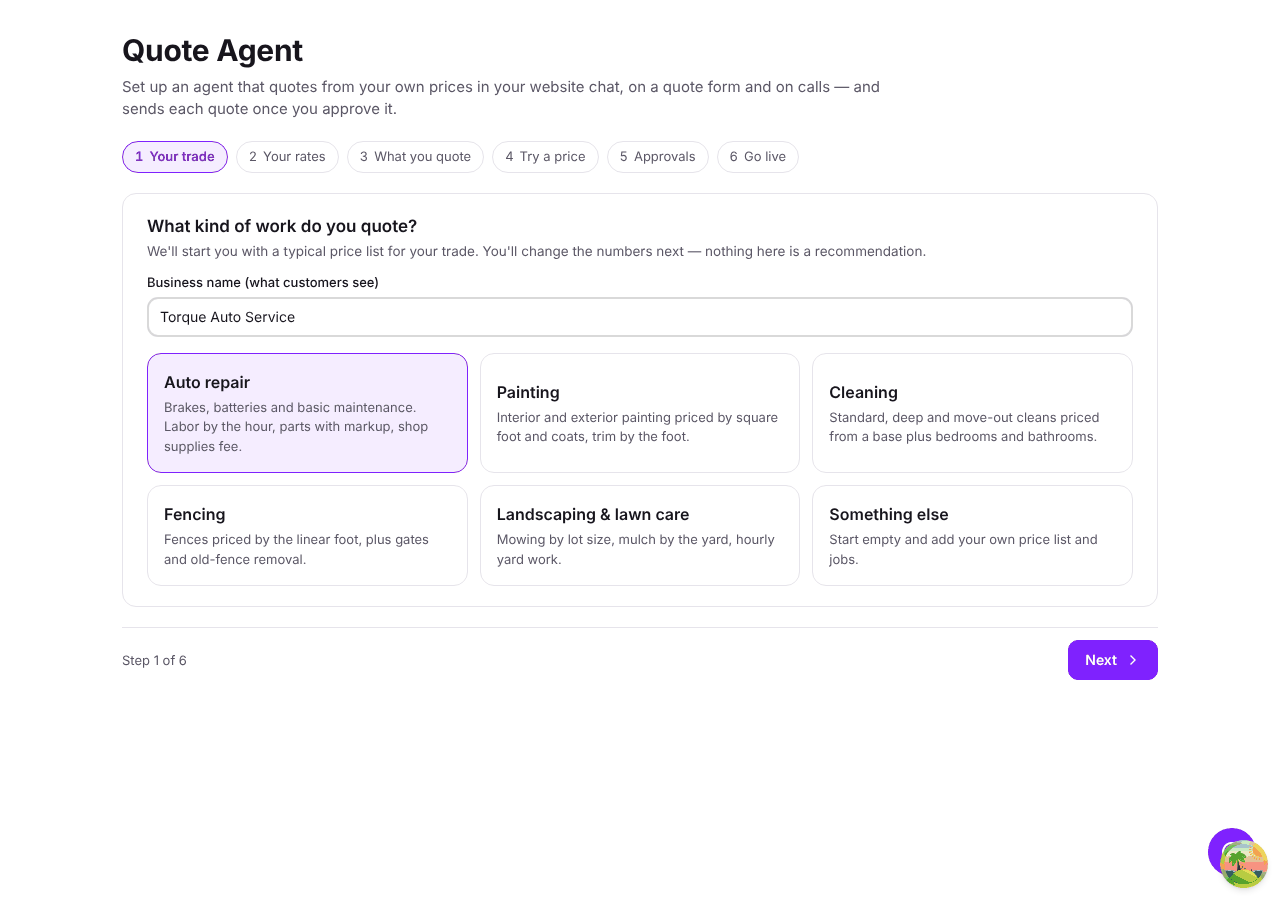
Enter your business name as customers should see it, then pick the kind of work you quote. Chatley starts you with a typical price list for that trade — you'll change every number on the next steps.
| Trade | Starts with |
|---|---|
| Auto repair | Front brakes, battery replacement, oil change. Labor by the hour, parts with markup, shop supplies fee. |
| Painting | Interior and exterior painting by square foot and coats, trim by the foot. |
| Cleaning | Standard, deep and move-out cleans from a base price plus bedrooms and bathrooms. |
| Fencing | Fences by the linear foot, plus gates and old-fence removal. |
| Landscaping & lawn care | Mowing by lot size, mulch by the yard, hourly yard work. |
| Something else | An empty list for you to fill in. |
2. Your rates
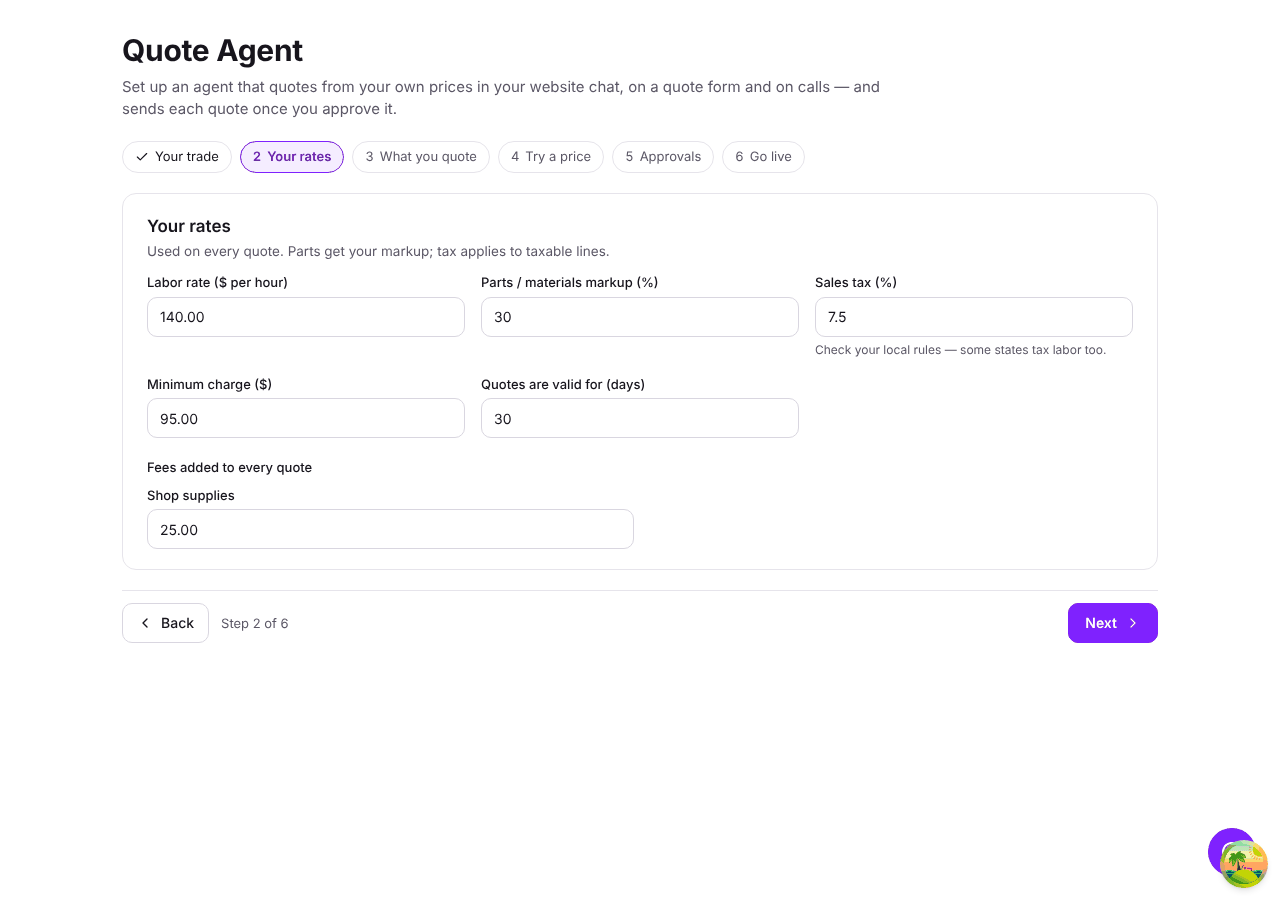
- Labor rate ($ per hour)
- Parts / materials markup (%) — added to the cost of parts and materials.
- Sales tax (%)
- Minimum charge ($) — small jobs are topped up to this amount.
- Quotes are valid for (days)
- Fees added to every quote — a shop-supplies or trip fee, for example.
3. What you quote
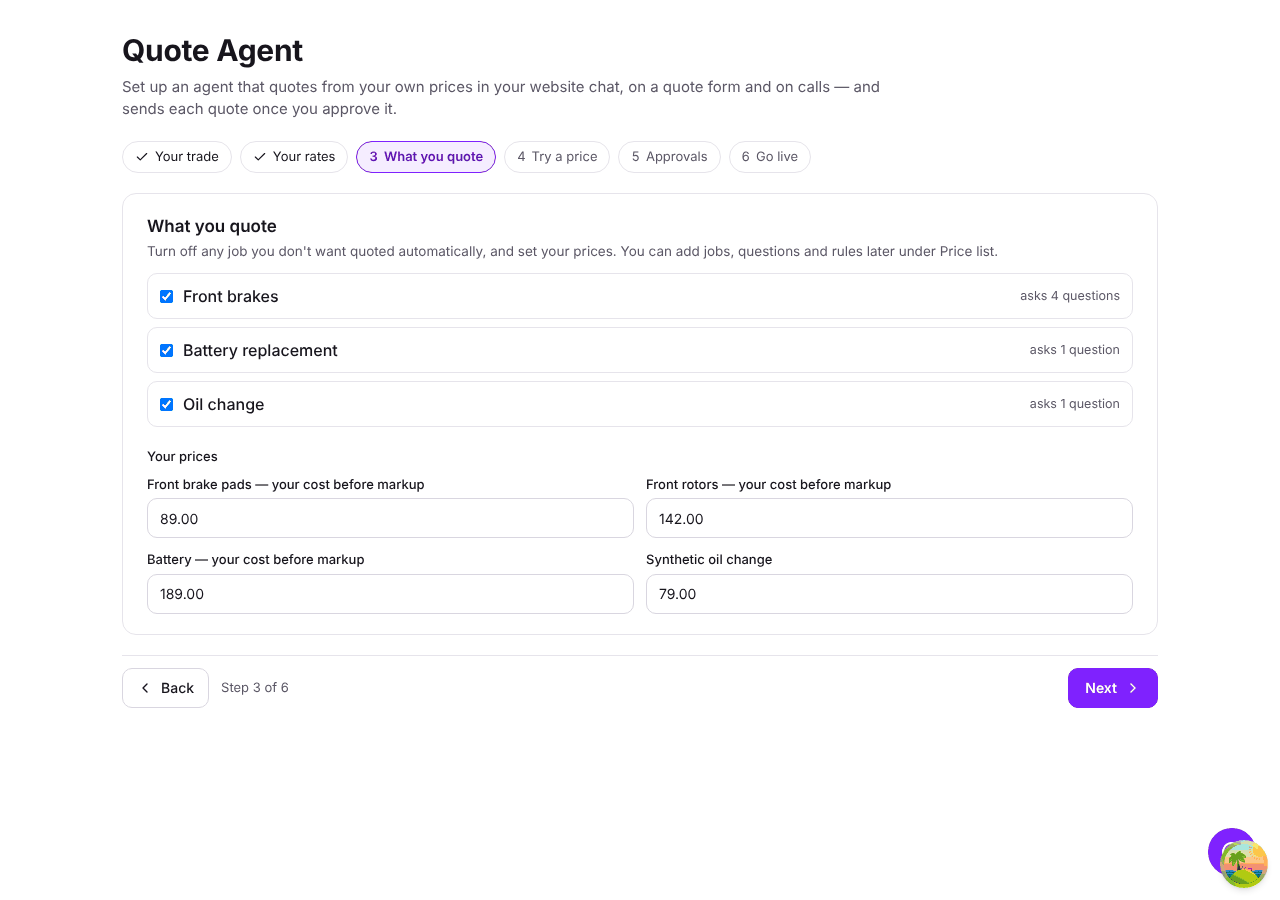
Tick the jobs you want the agent to price and set the prices of the parts and materials they use. You can add your own jobs later under Price list.
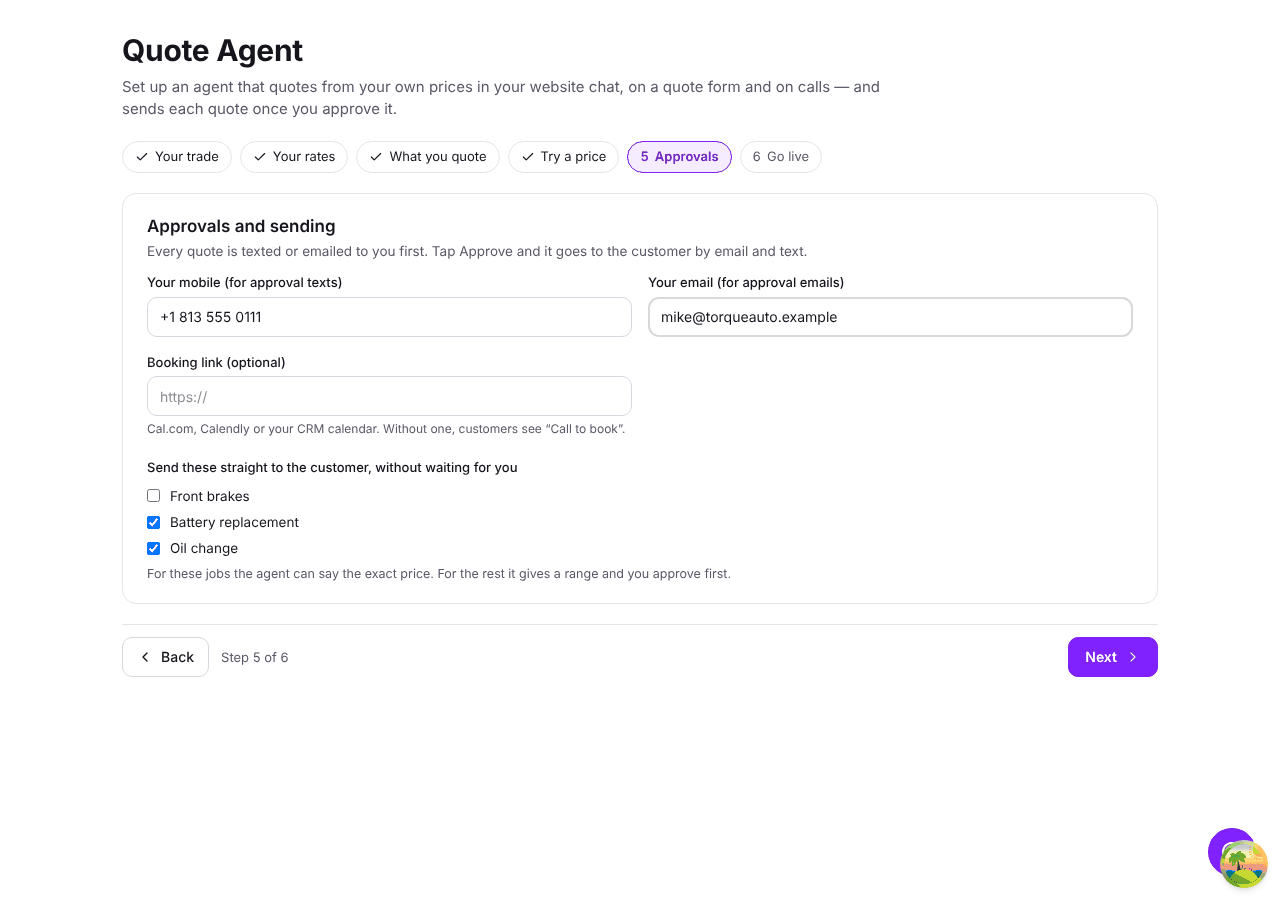
For each job you can also allow Send these straight to the customer, without waiting for you. For those jobs the agent can say the exact price and the quote goes out immediately; for the rest it gives a range and you approve first.
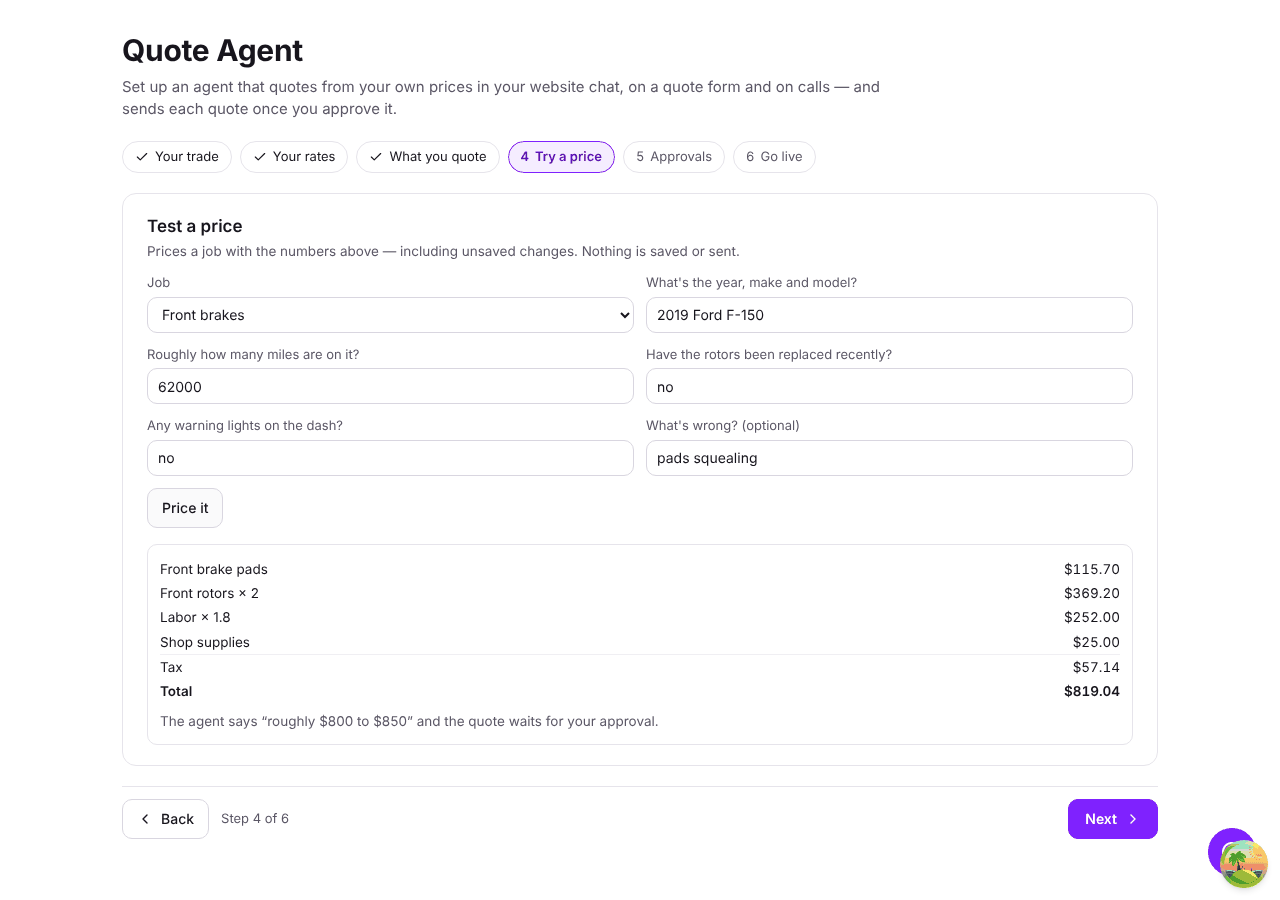
4. Try a price
Pick a job and answer its questions the way a customer would. You see exactly what the customer would hear and the itemized quote you would approve. Change the answers to check different cases.
5. Approvals
- Your mobile (for approval texts) and Your email (for approval emails). If you leave the email blank, approvals go to the workspace owner's email.
- Booking link (optional) — shown on the customer's quote as Pick a time. Without one, the quote shows Call to book.
6. Go live
Choose Create a new Quote Agent (recommended) or pick one of your existing agents, give it a name and a voice, then click Create my Quote Agent. Setup takes up to a minute.
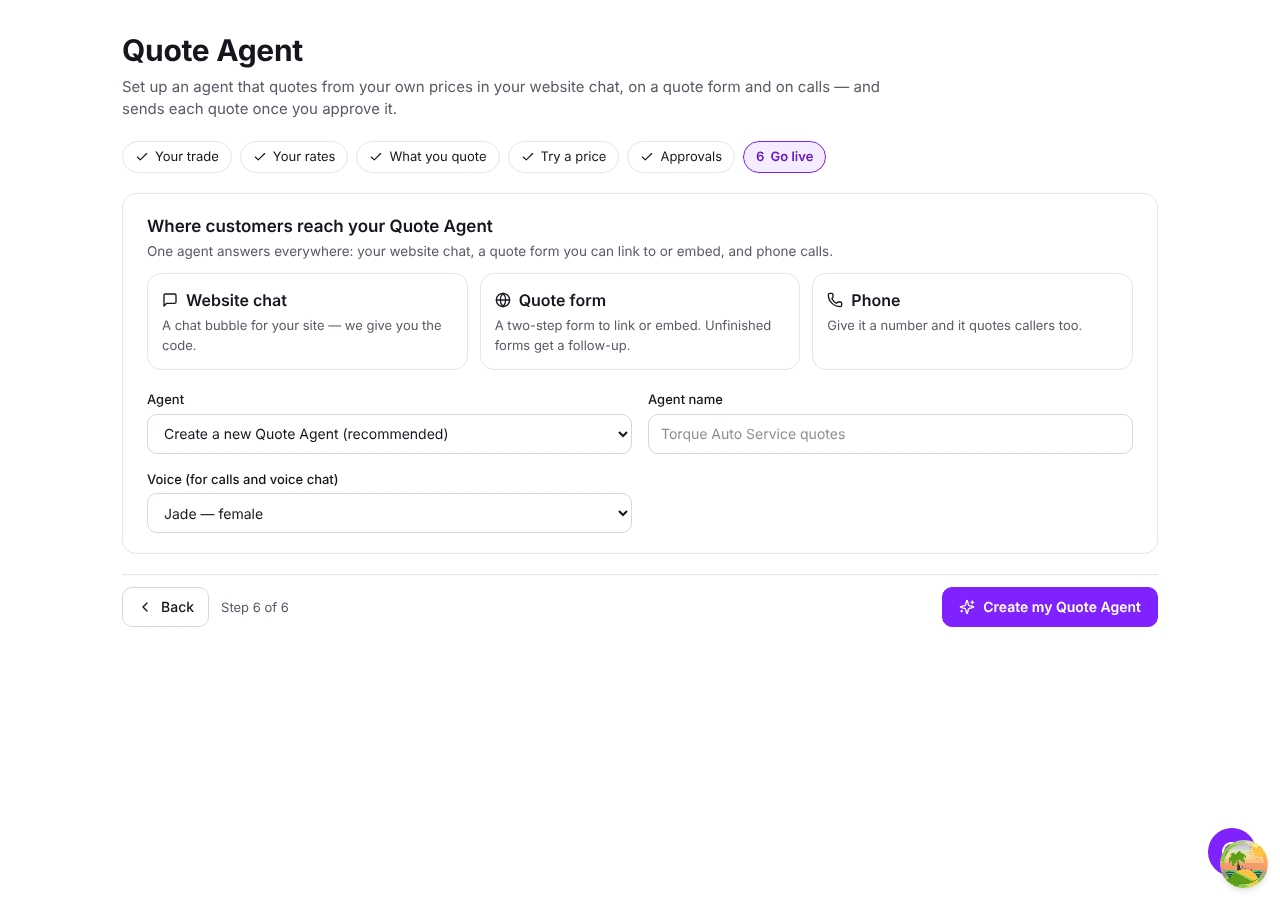
If you pick an existing agent, Chatley connects pricing to it but leaves its instructions as they are. Add a line telling it to use the pricing tool for quotes — the Channels & settings tab has the exact line to paste.
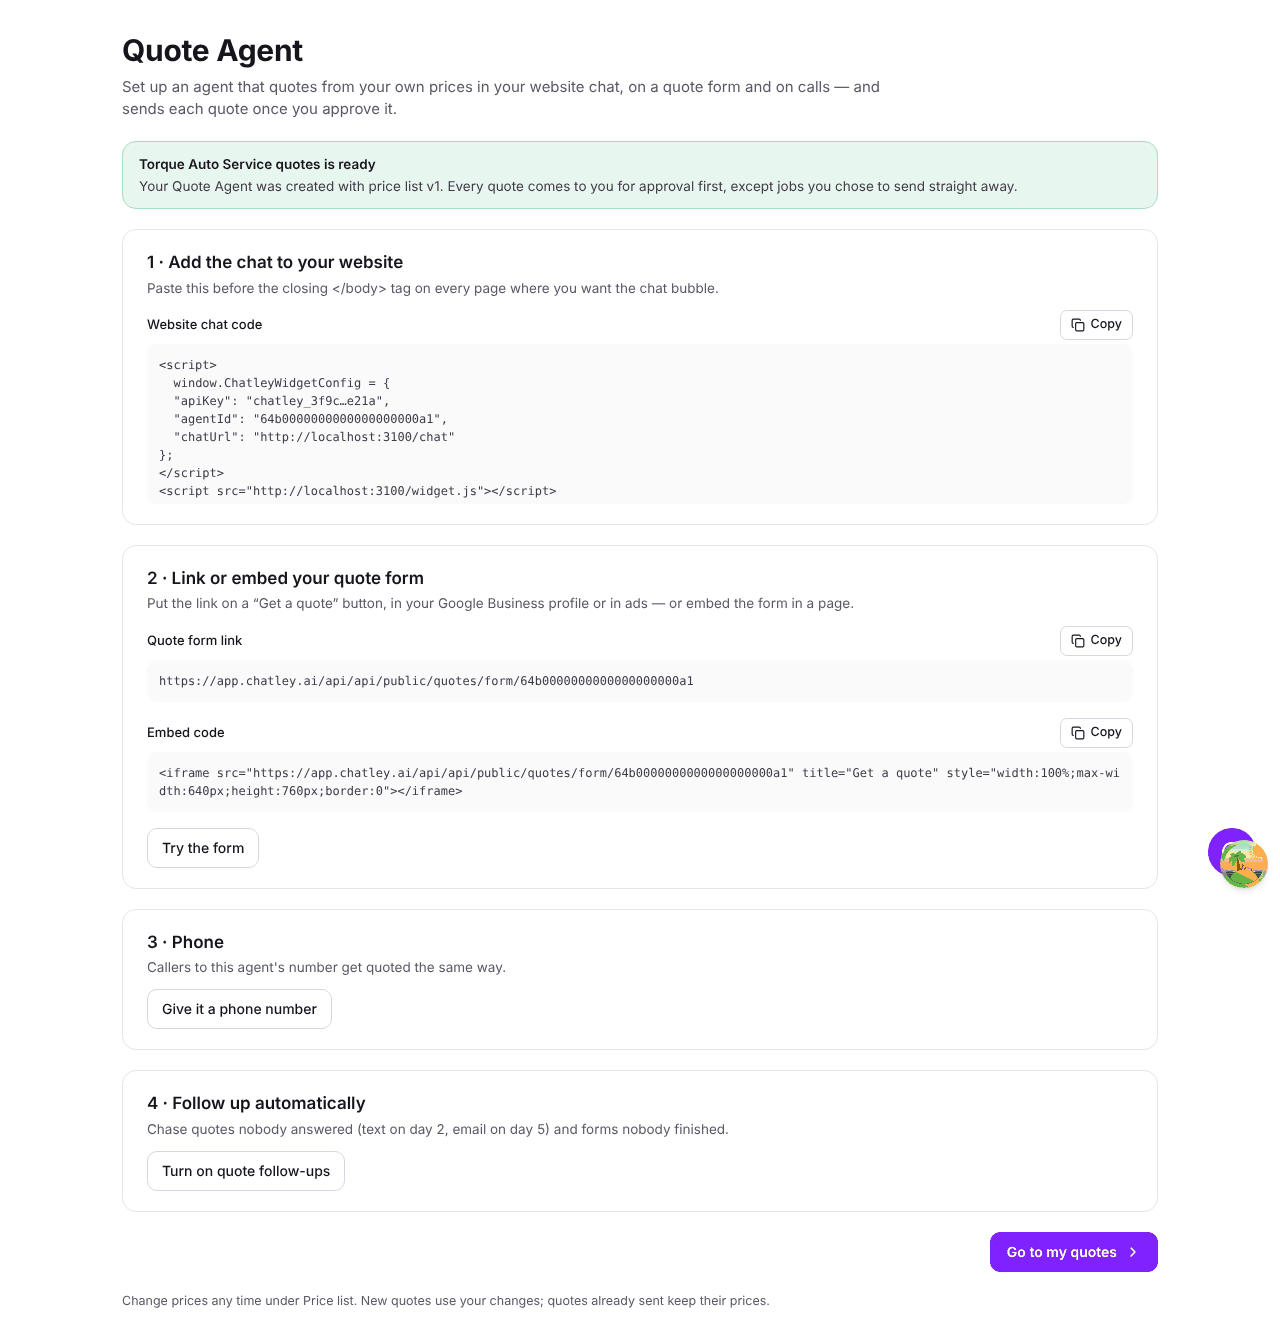
Done — put it to work
The last screen gives you everything you need:
- Add the chat to your website — copy the Website chat code and paste it
before
</body>on your site. - Link or embed your quote form — copy the Quote form link to use on a button, in an email or in your social profiles, or the Embed code to place the form inside a page.
- Phone — give the agent a phone number and callers can ask for quotes too.
- Follow up automatically — turn on quote follow-ups.
Setup works on a phone too: